--
Electronics on Canvas
Exploring Creative Fusion of Painting and Electronics
--
--
Electronics on canvas — a wired dreamscape.
Where logic and intuition can live as one.
--
--
INTRODUCTION
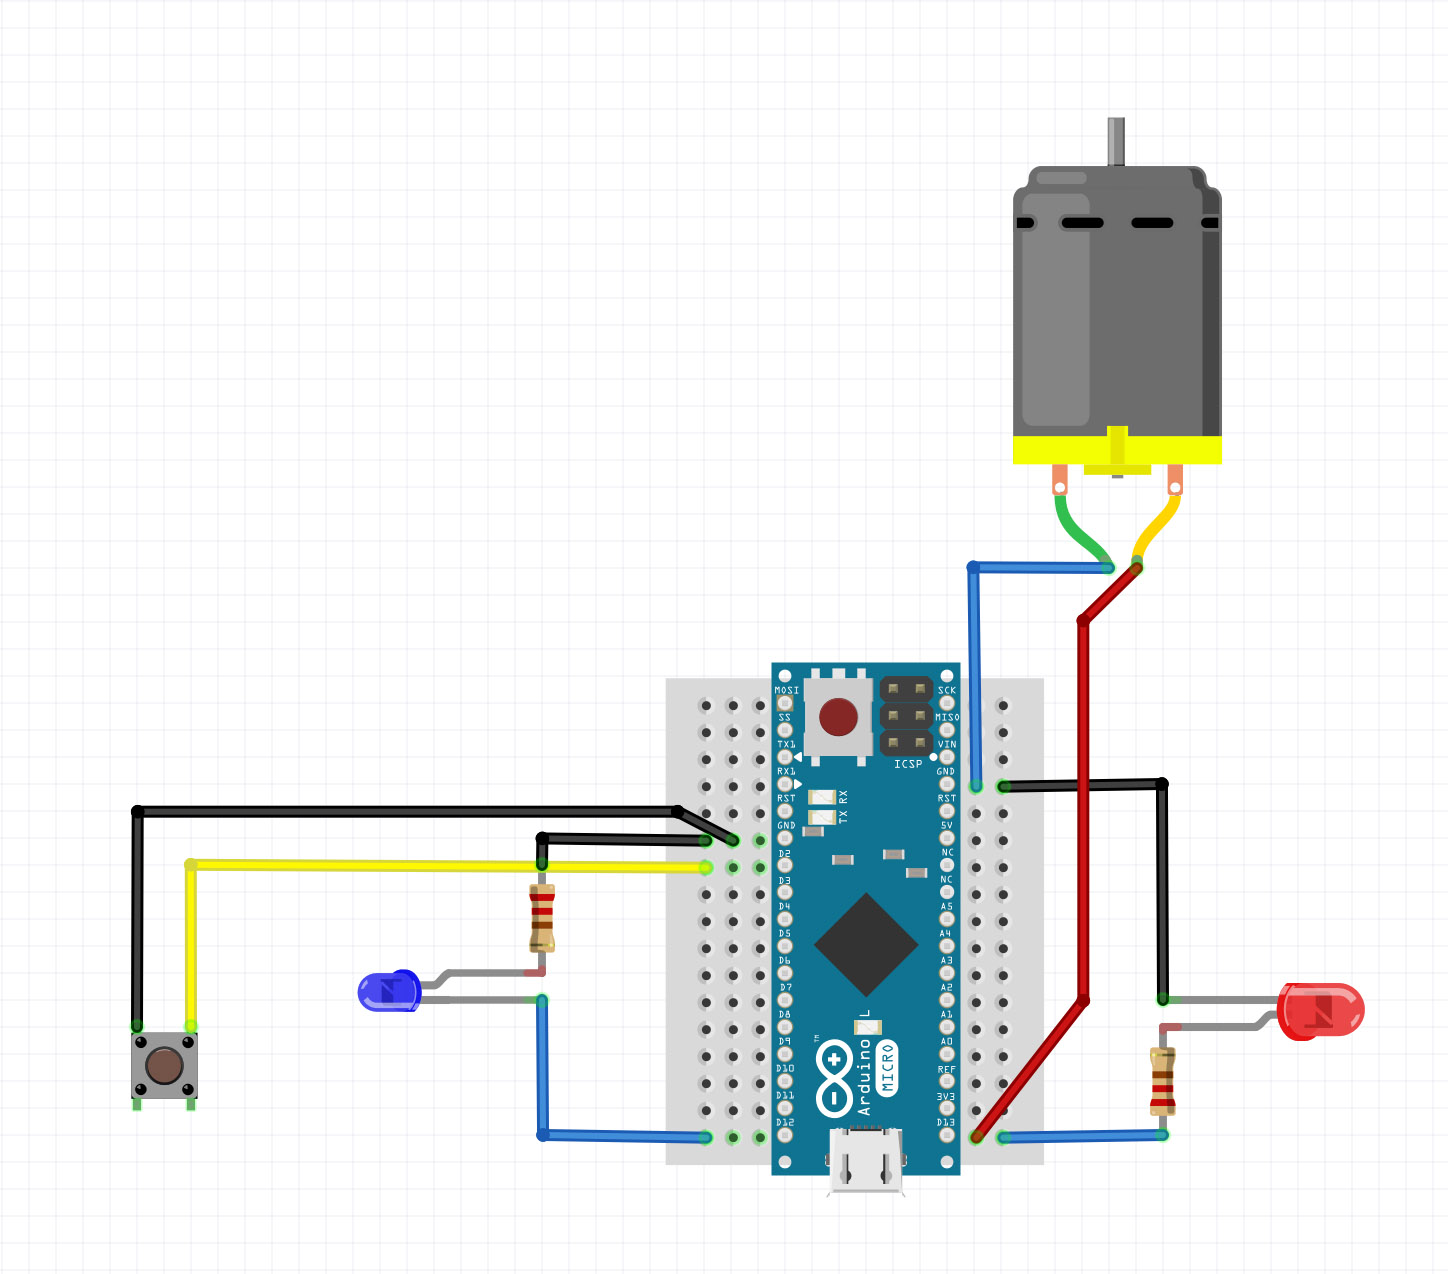
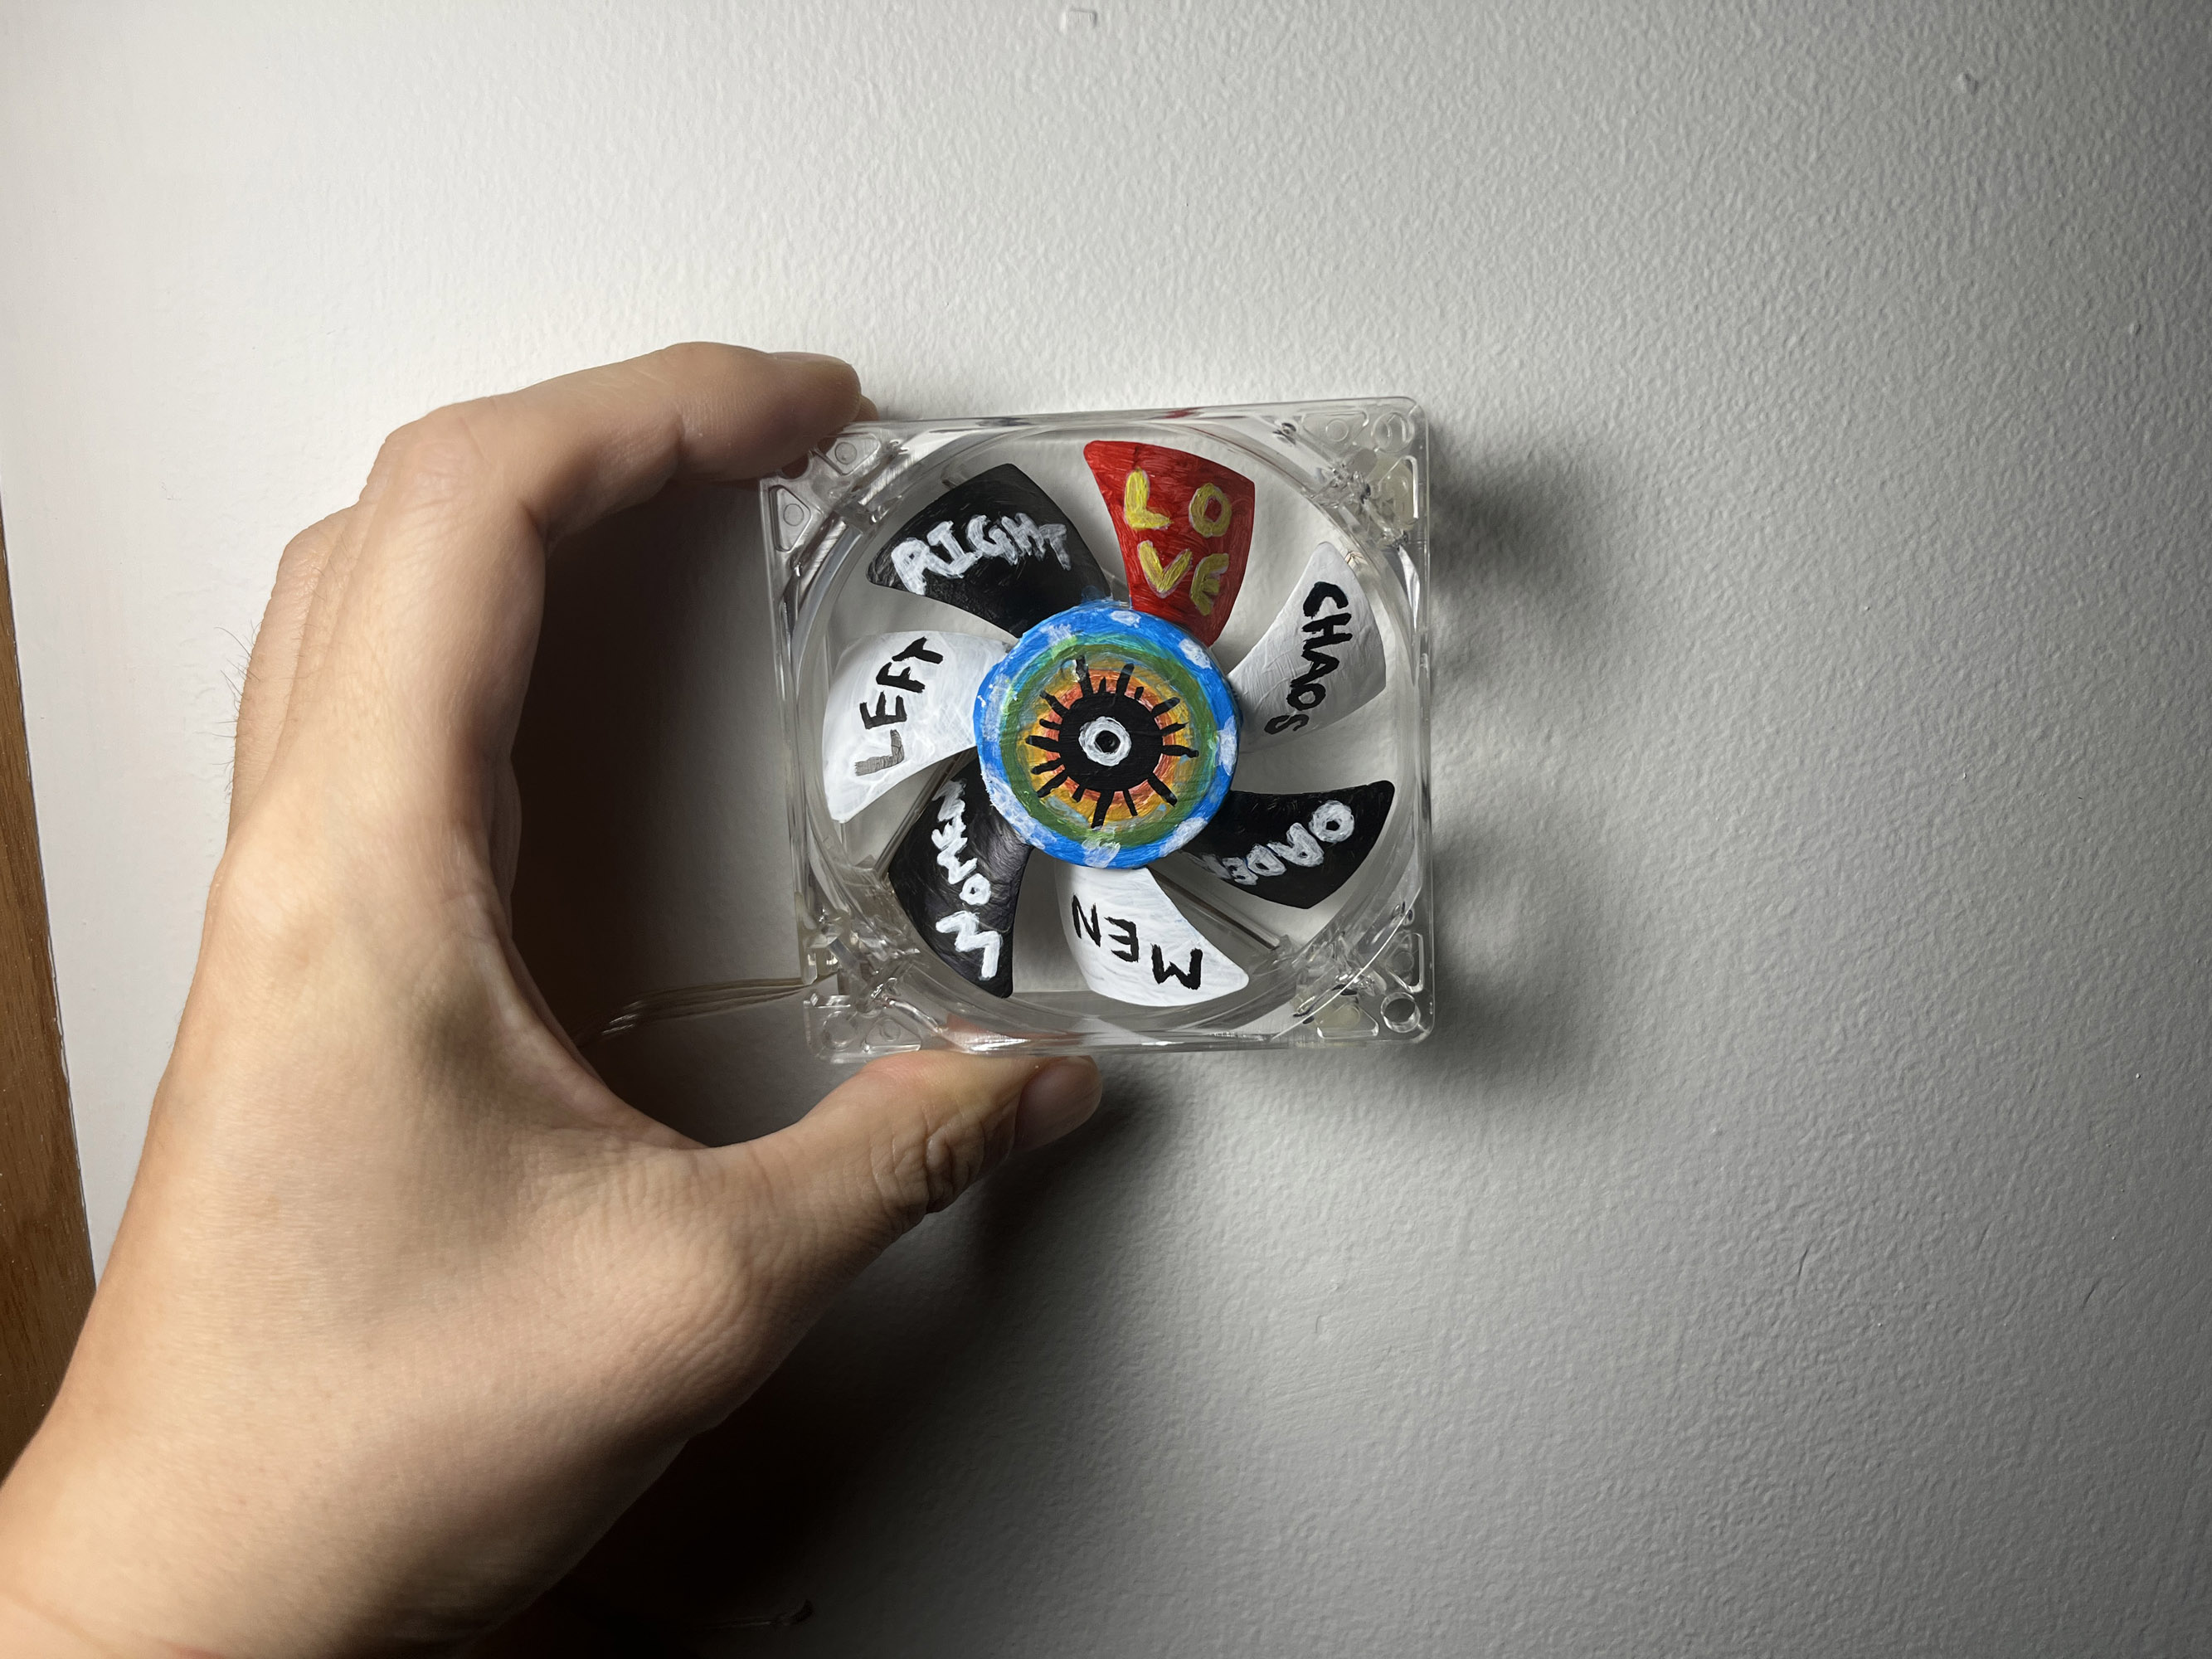
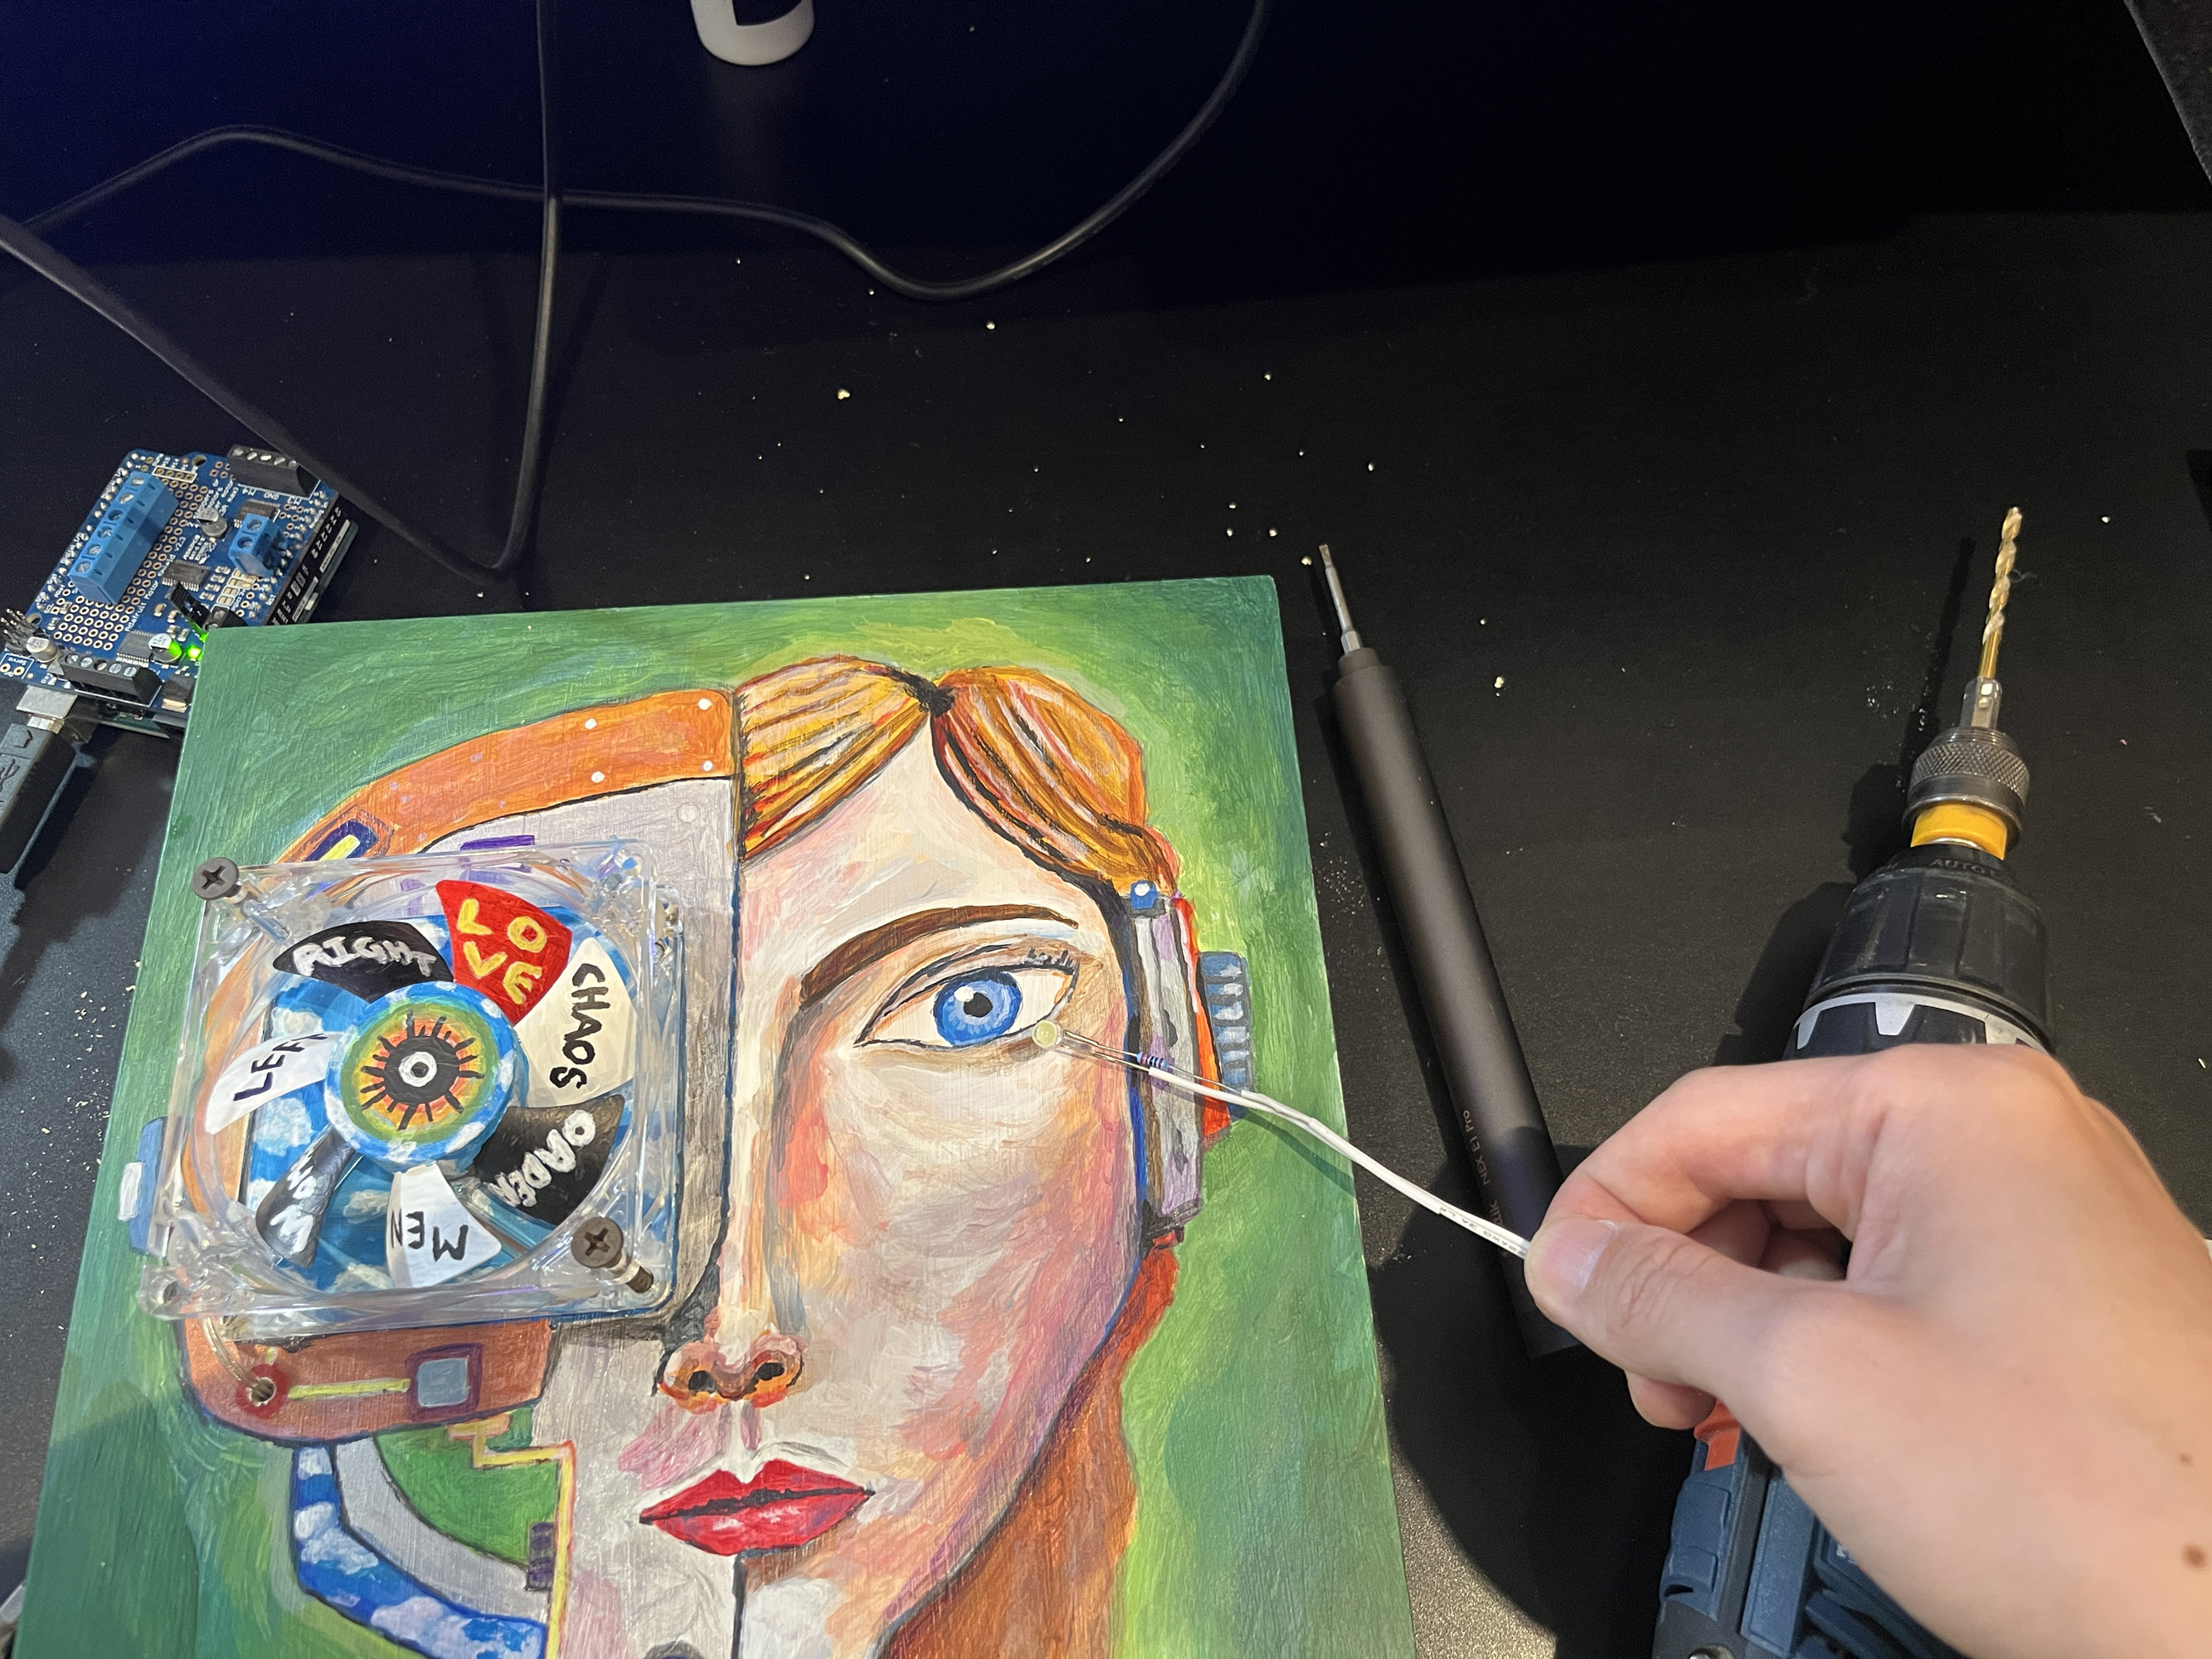
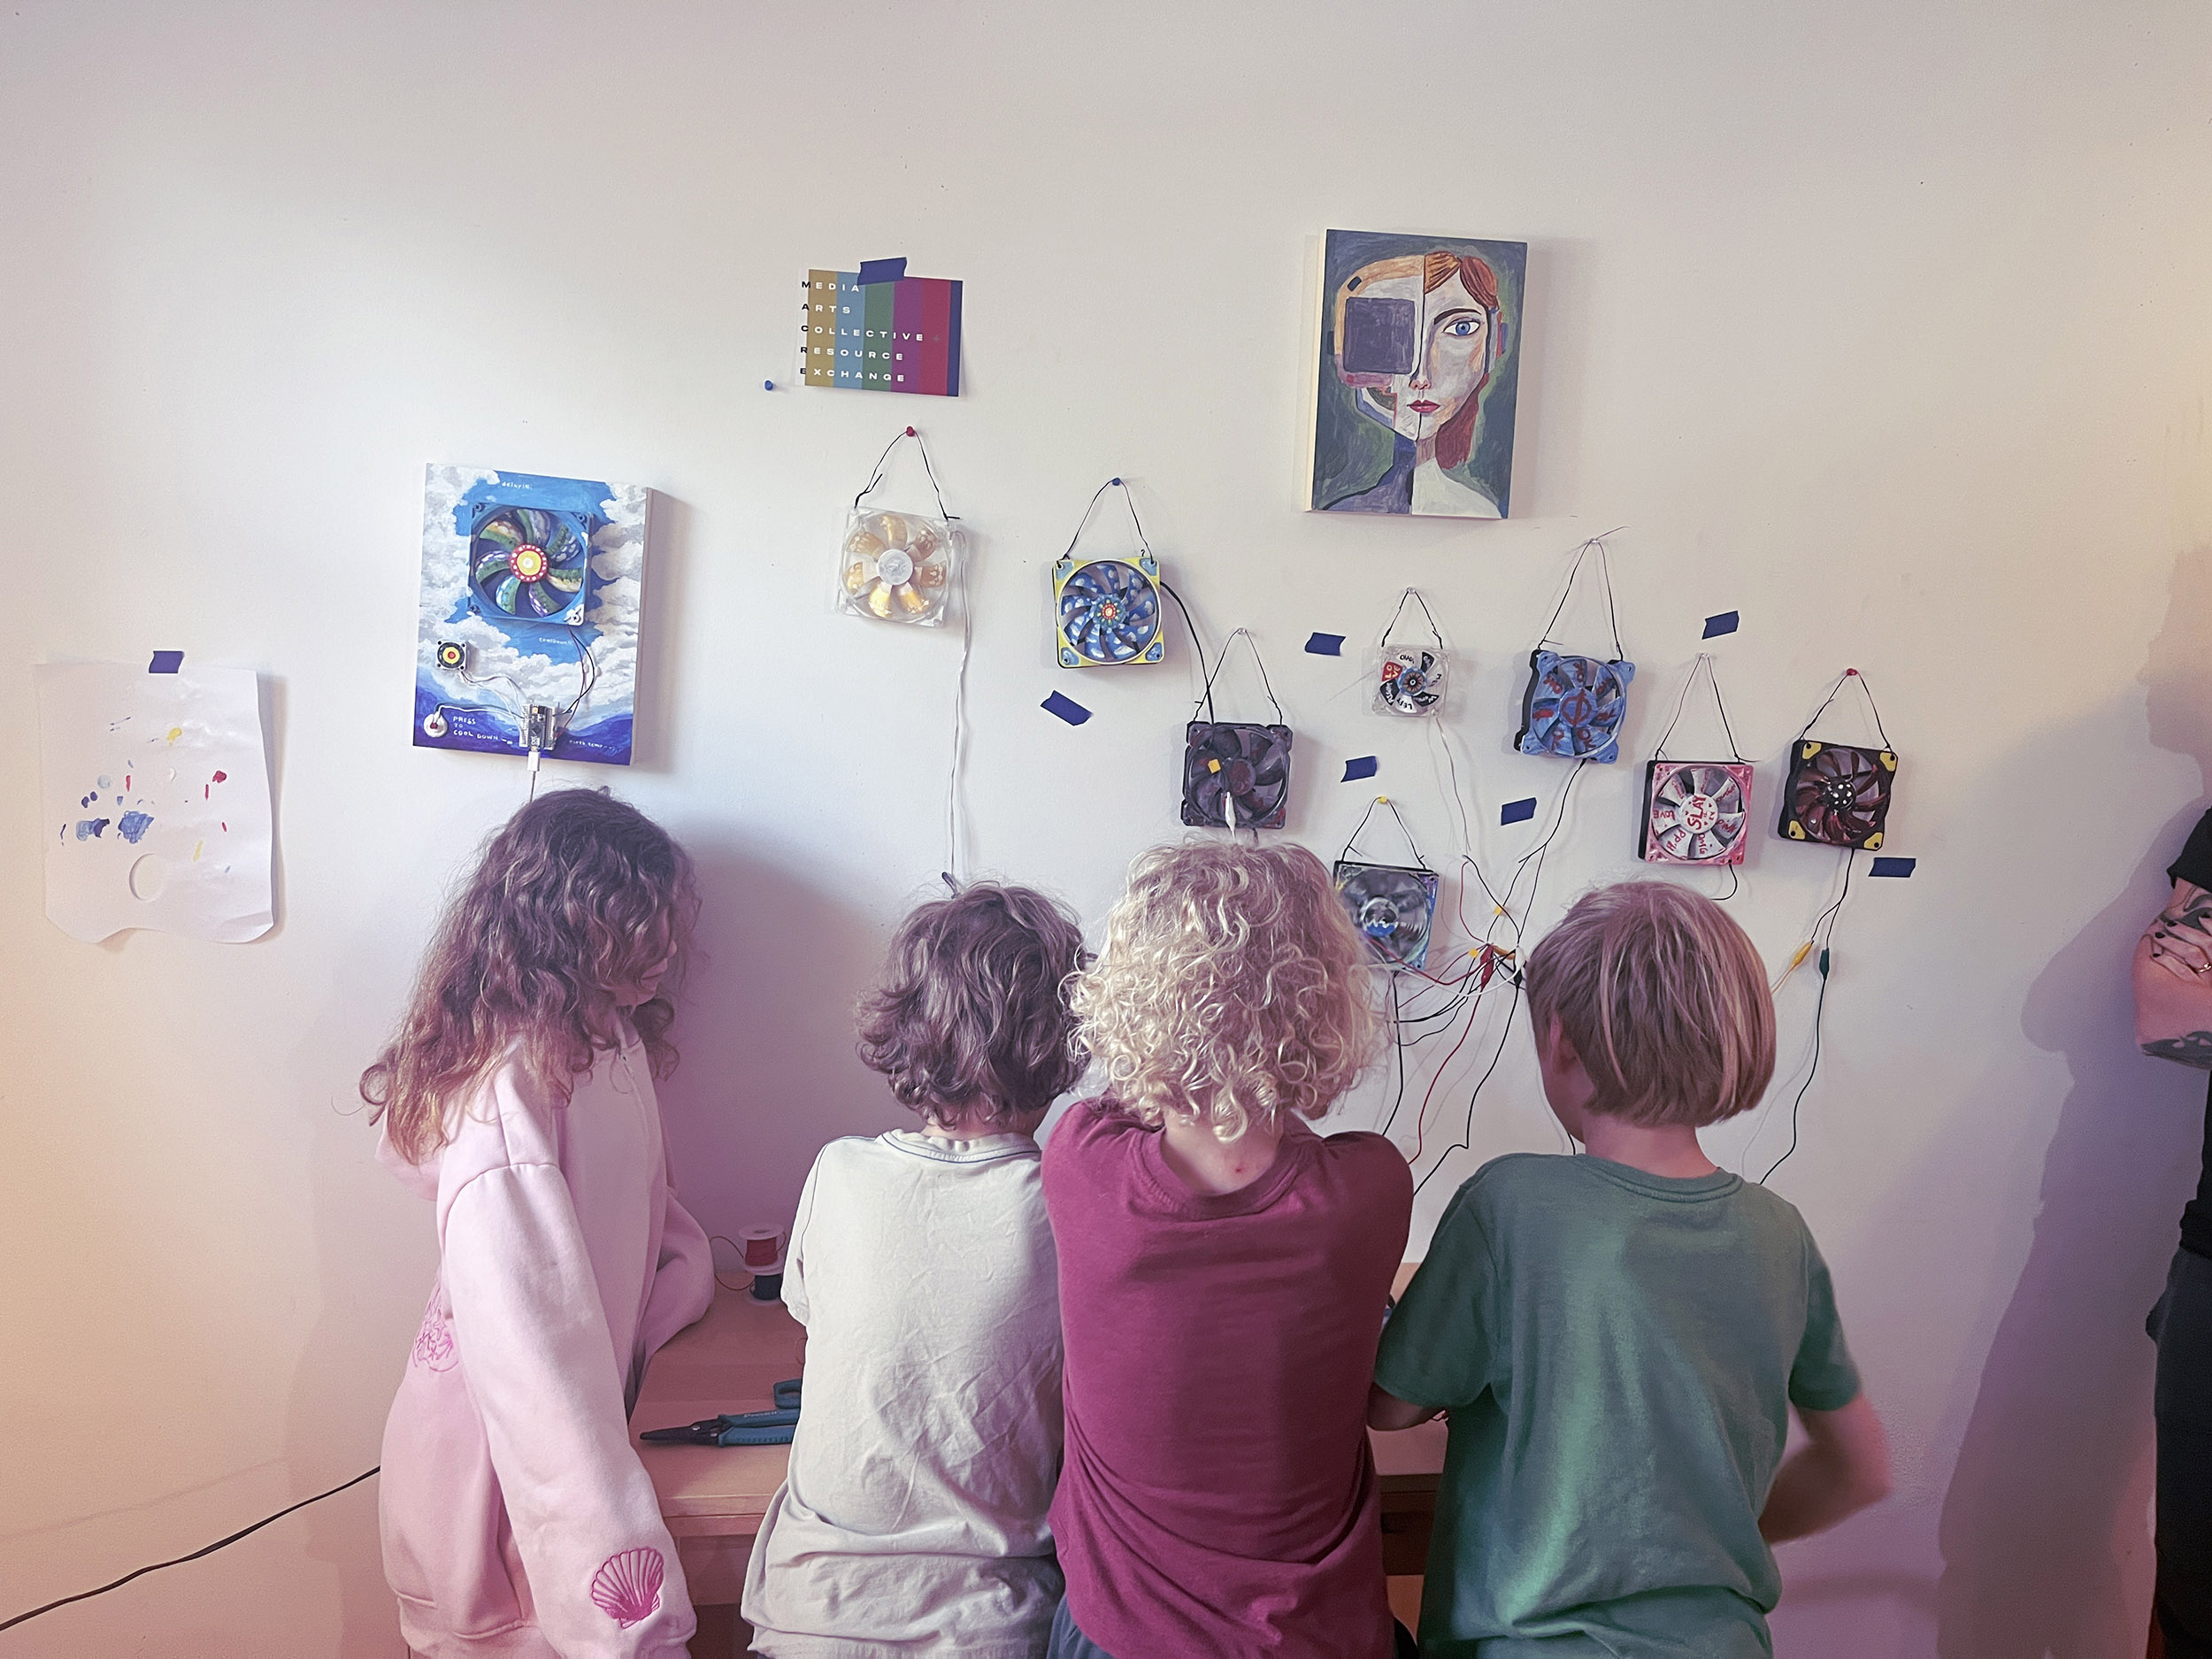
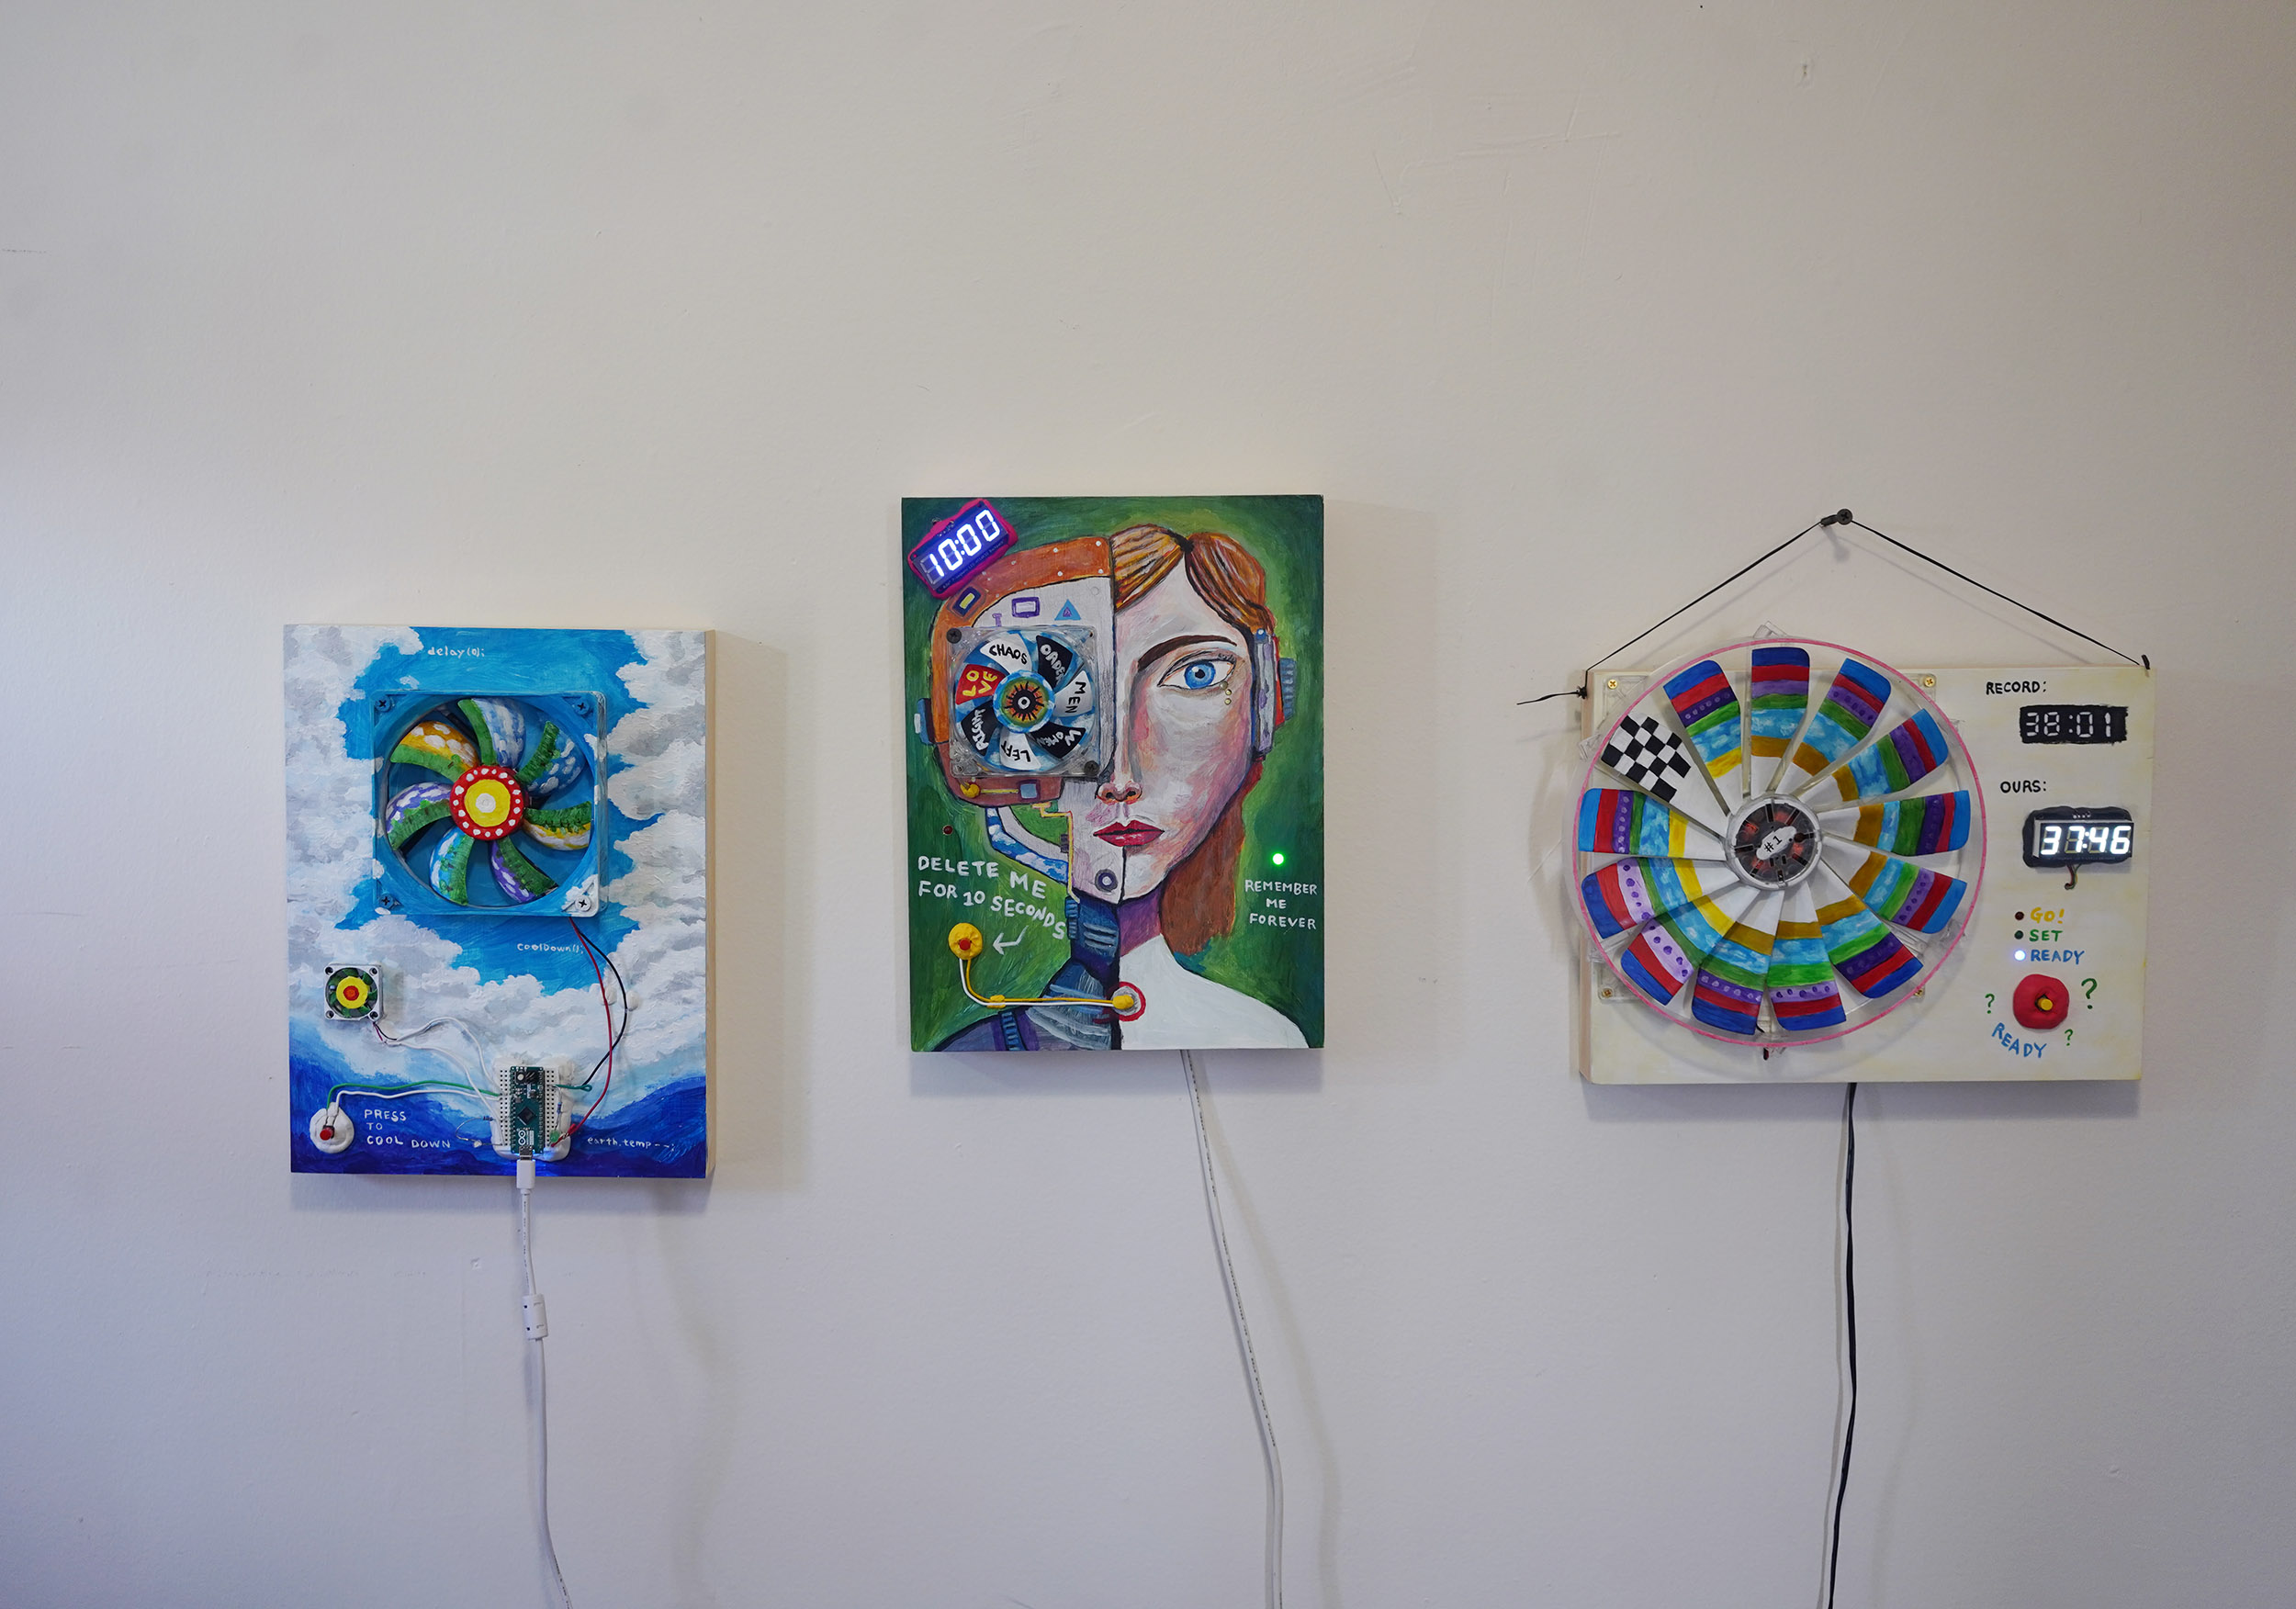
Electronics on Canvas — this fusion of art and engineering invites creators to explore the intersection of creativity and circuitry. This website presents three example paintings that I created during the Artist-in-Incubator program at MACRE (Media Arts Collective + Resource Exchange) in Spring 2025, demonstrating how to integrate an Arduino microcontroller with electronic components — such as LEDs, sensors, and mechanical elements — into traditional painting. By combining traditional art materials with interactive electronics, participants learn how to transform static artworks into dynamic, responsive creations, unlocking new ways of thinking where imagination and innovation converge.
BACKGROUND
Art and engineering, often seen as separate today, have historically been closely linked. The word "art" comes from the Latin "ars," which traces back to the Greek "techne," meaning skill or craftsmanship, especially in creating physical things. Similarly, "technology" combines "techne" with "logos" (meaning word or myth), originally signifying the "story of human dexterity." For centuries, the distinctions between art, craft, and engineering were unclear, with figures like Leonardo Da Vinci embodying both artistic and engineering skills. Concepts that now separate artists from engineers—such as intuition vs. logic or creativity vs. practicality—were once seen as part of a shared practice of human skill and technique.This "electronics on canvas" approach offers a first step toward embracing this interdisciplinary human nature, merging the intuitive creativity of traditional painting with the methodical, logical principles of engineering. By combining traditional art materials with computational electronics, participants will learn to transform static artworks into dynamic, responsive creations—unlocking new ways of thinking where artistic imagination and engineering innovation meet and merge.
Press to Cool Down


Press to Cool Down
delay(0); // urgent, now
coolDown();
// initiate the deepsea cooling protocol
earth.temp--;
// one breath closer to balance
--
Delete Me for 10 Seconds

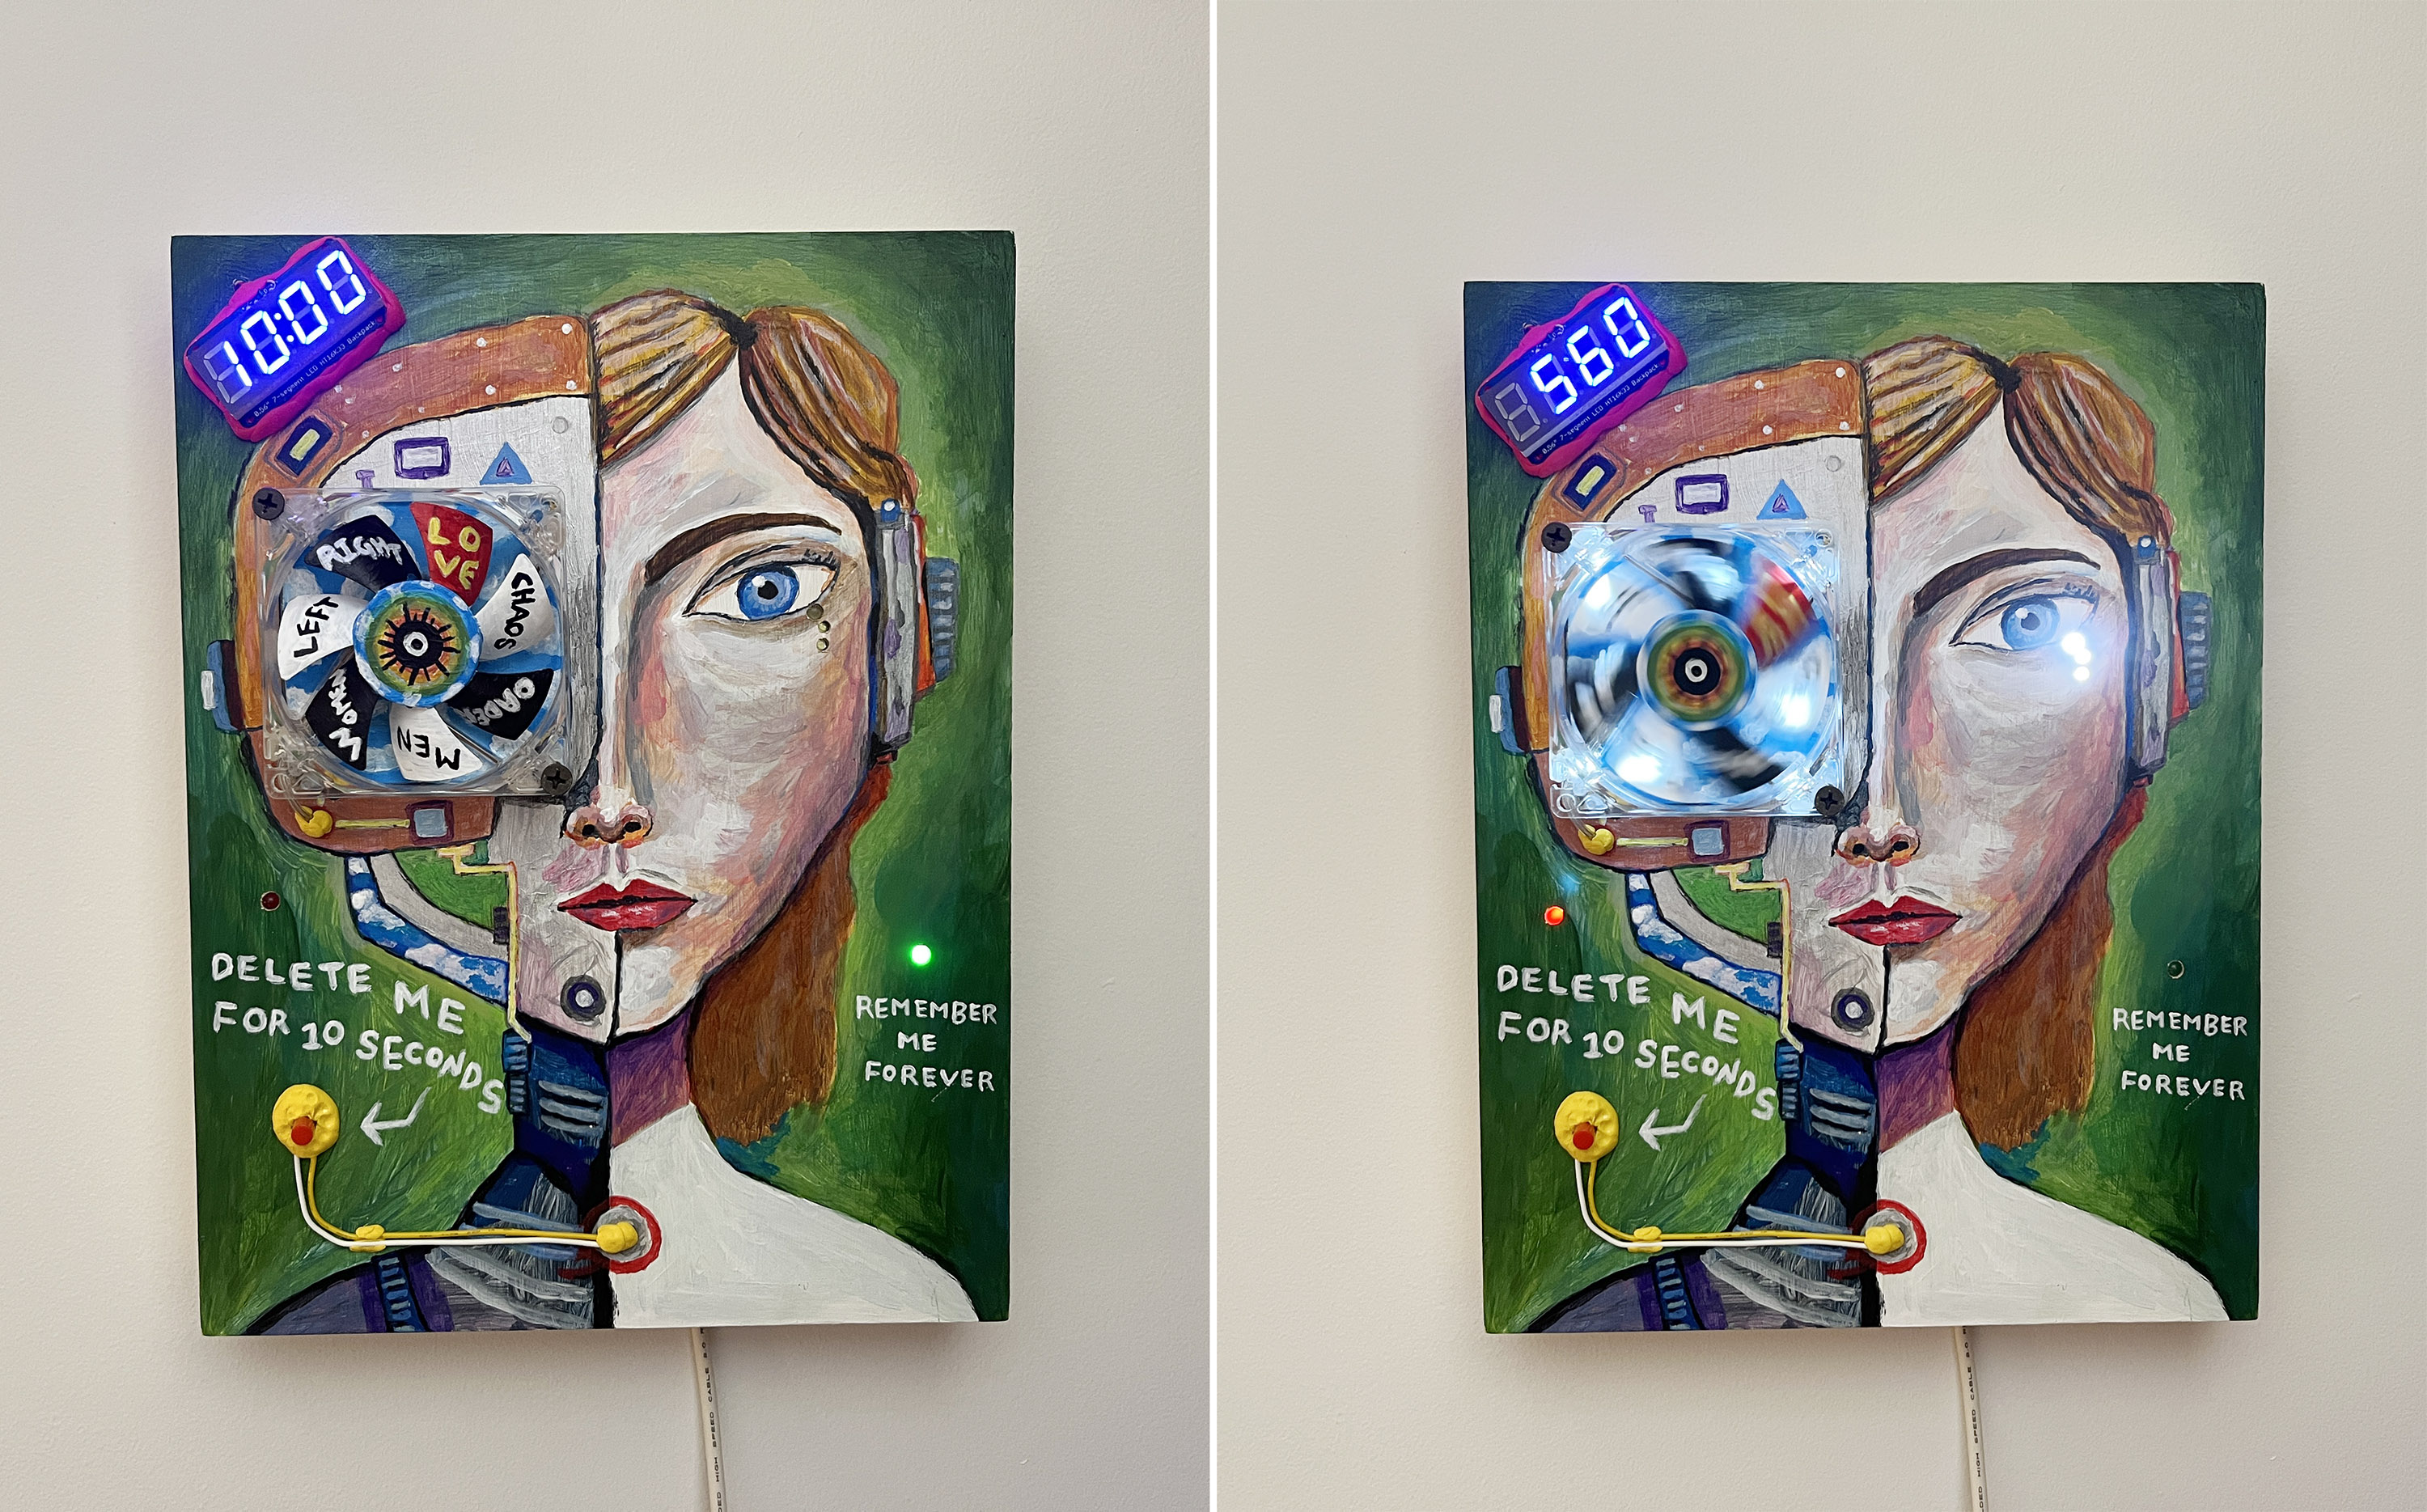
Delete me for 10 seconds,
Let 0 fill the space where I once stood.
Remember me forever,
In the echo of what we could have been.
--
We are #1
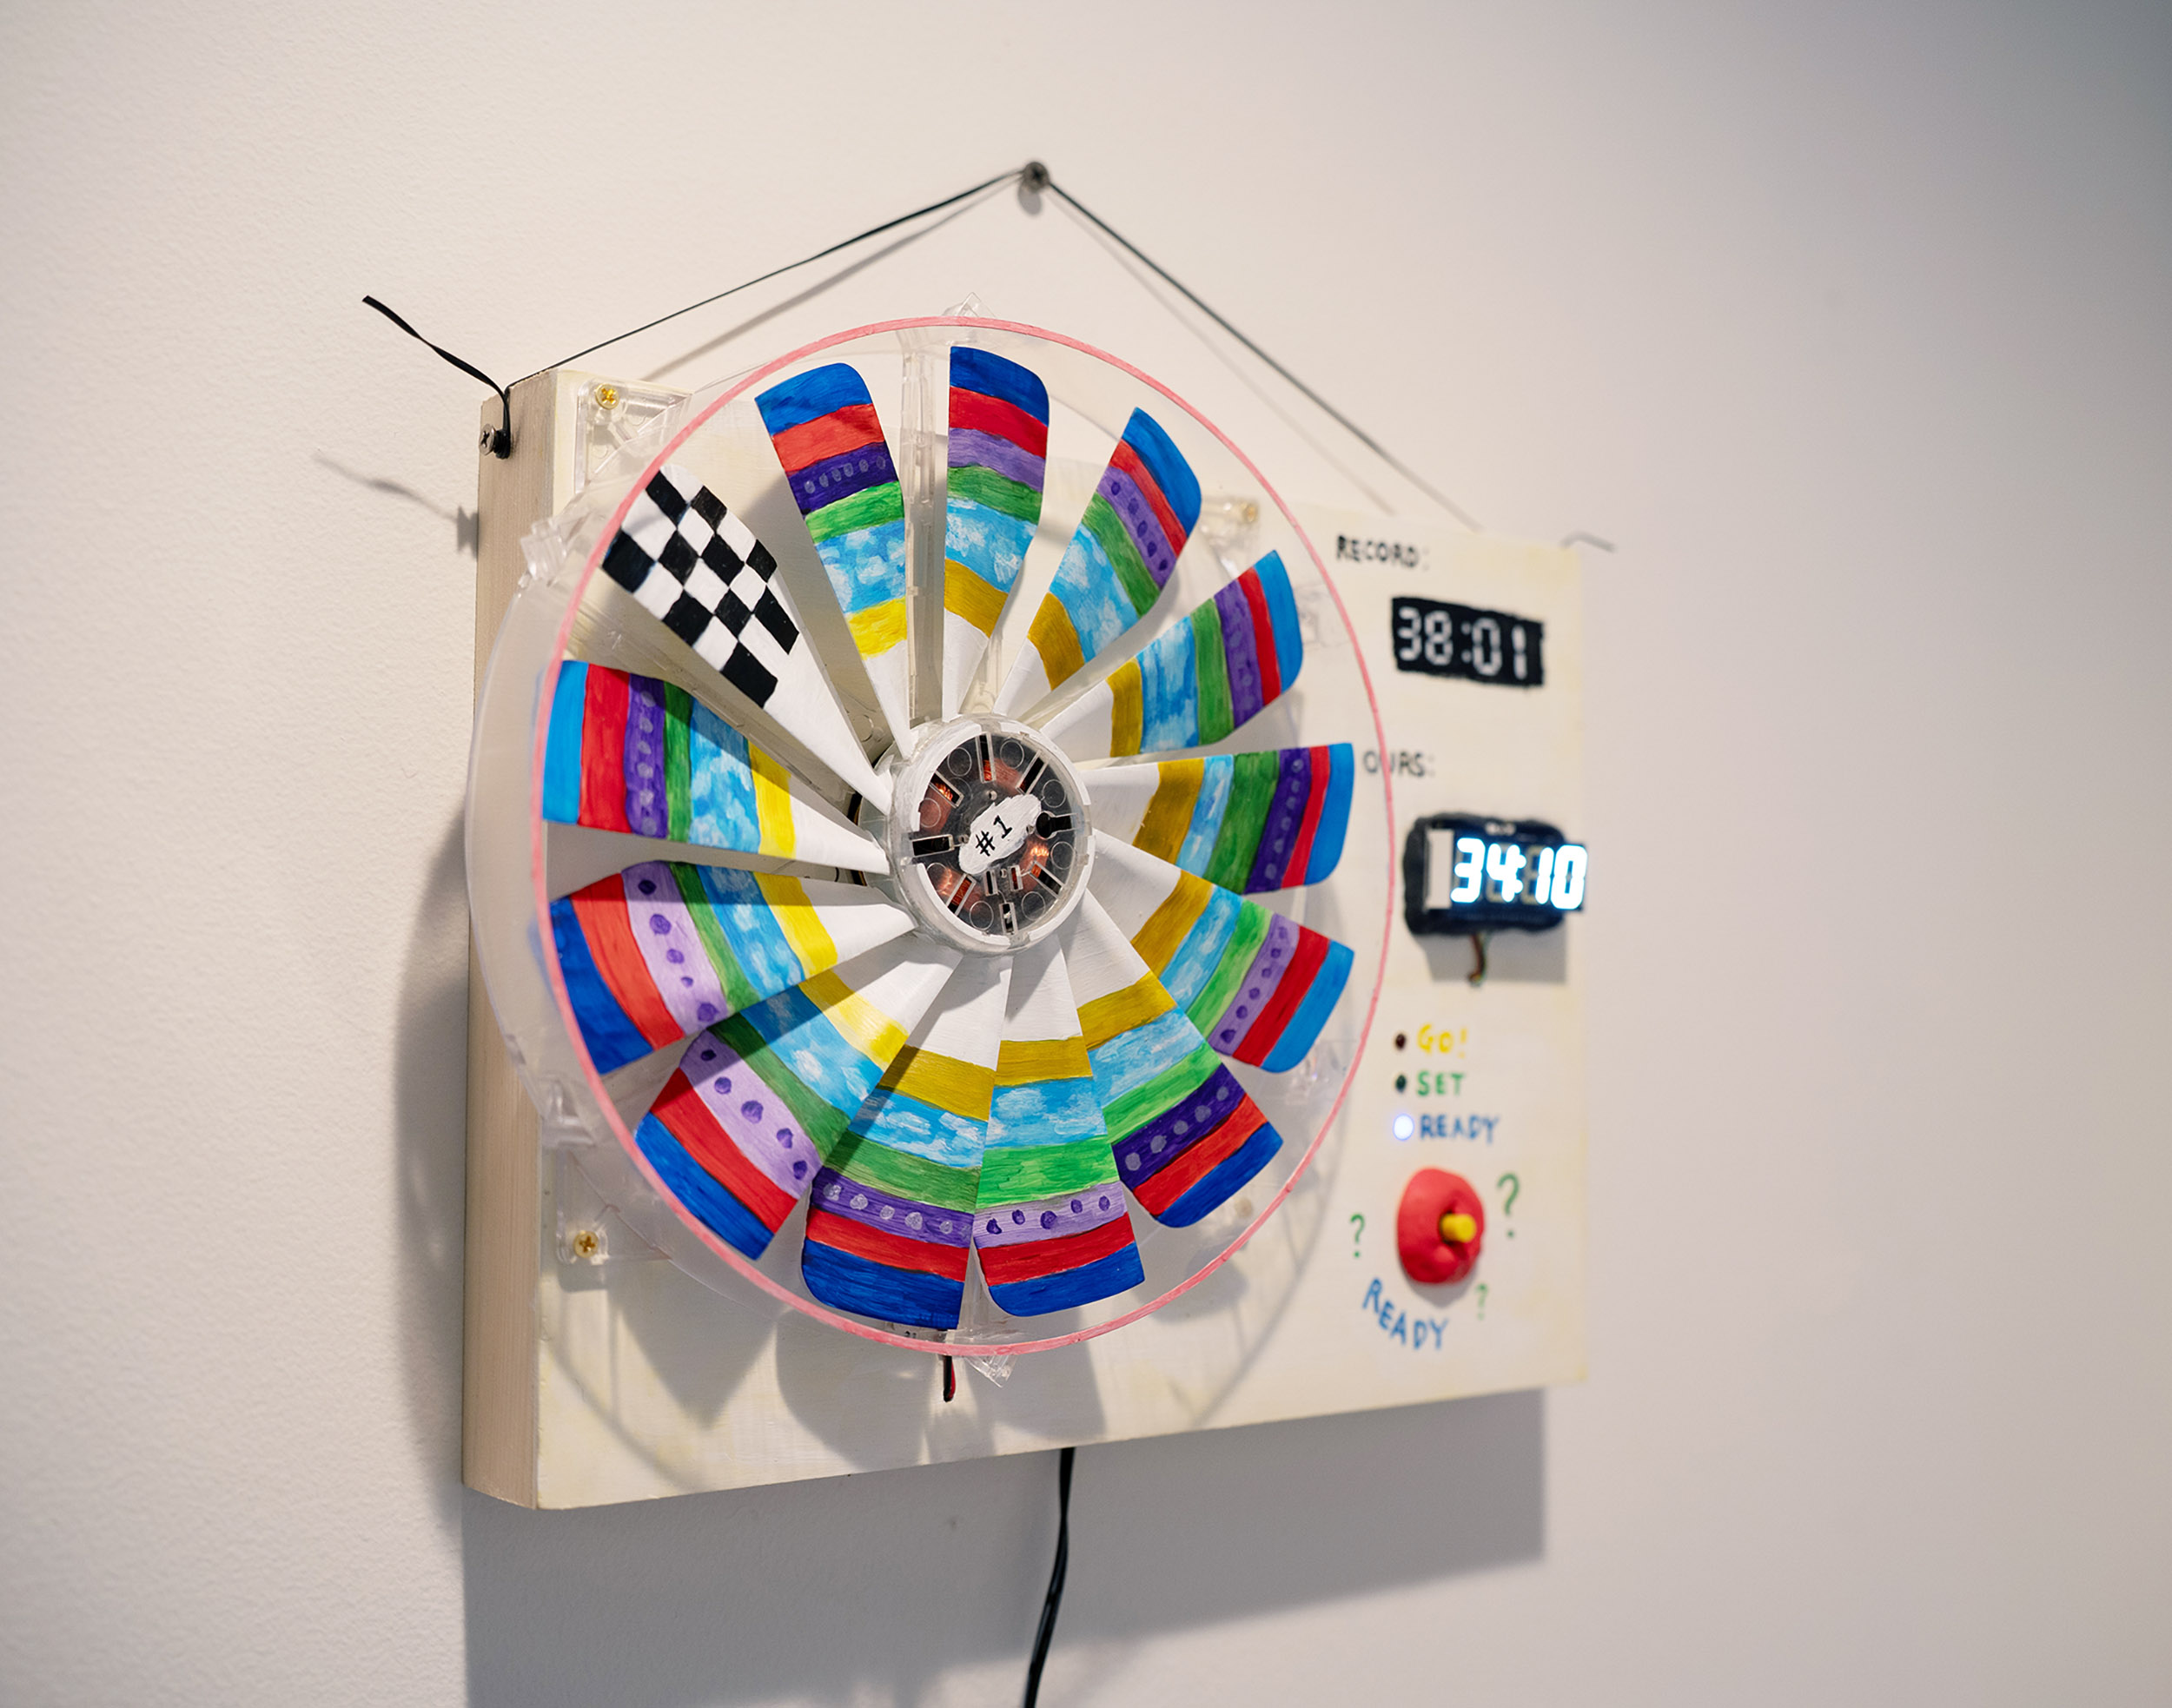

if (numberOne) breakRecord();
We were programmed to win.
Try whatever you want.
And learn this: we are #1.
--
Gallery